
PCBA Potting DFM Checklist: Design, Masking, Test, and Manufacturing Handoff
SUNTOP Electronics
PCB Assembly Team
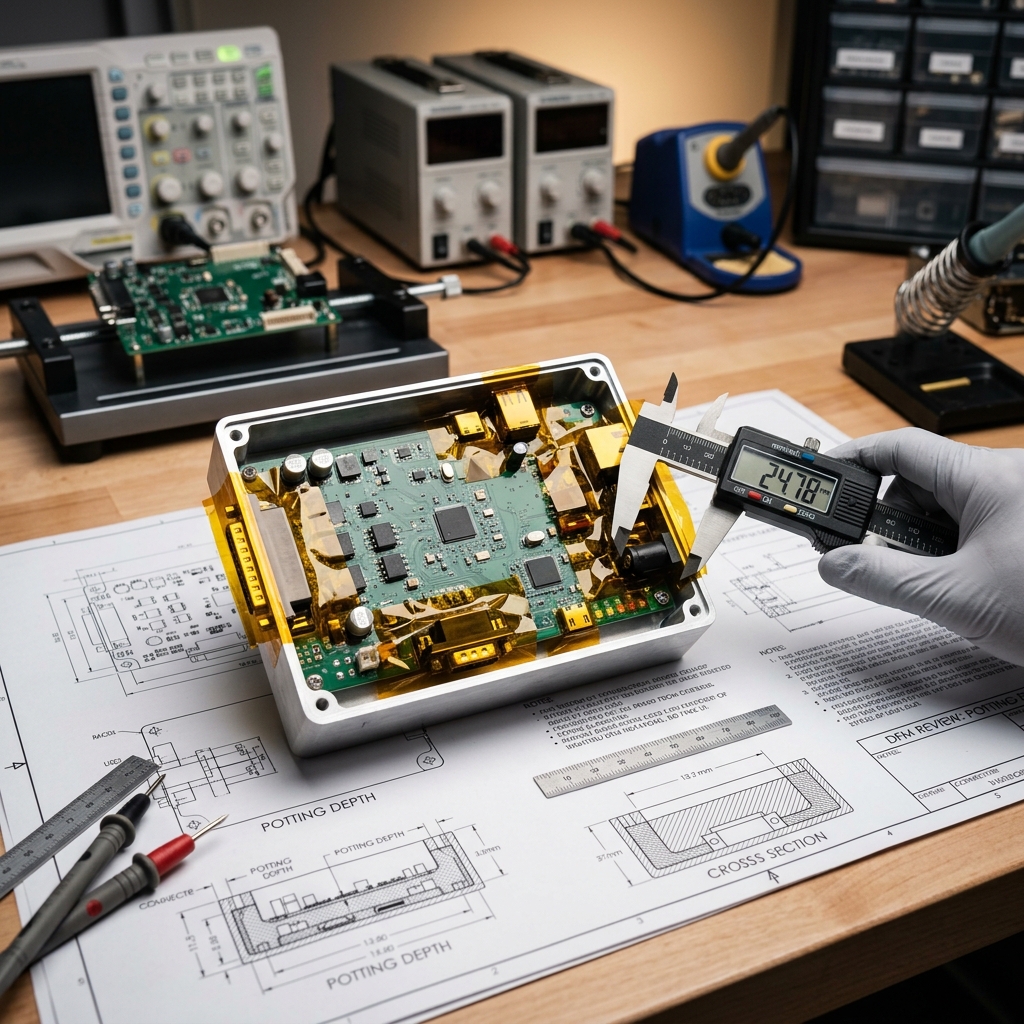
PCBA potting is easiest to control when it is considered before the board is released for quote or production. Once a potted assembly is cured, many design decisions become difficult to change: test points may be covered, connectors may be blocked, labels may be hidden, a trapped-air area may be impossible to inspect, and a repairable unit may become a replacement-only module.
That is why a potting DFM review belongs alongside the normal PCB and PCBA handoff review. It translates an intention such as “potting required” into the drawings, keepouts, test plan, material inputs, and acceptance criteria that a supplier can actually build against.
This PCBA potting DFM checklist focuses on the questions that should be answered before a supplier prices the job or starts fixtures. It complements the general PCB DFM checklist and the broader PCBA potting process guide.
Why Potting DFM Should Be Reviewed Before PCBA Quoting
Potting is not a generic final operation. It interacts with board layout, enclosure geometry, components, connectors, labels, test access, handling, cure, and final inspection. If those interactions are unclear, the supplier has to make assumptions or return questions after the quote is already underway.
A potting DFM review helps the team establish:
- where resin must go, and where it must never go
- how the board and enclosure will be fixtured during fill and cure
- whether the resin can flow around components and allow trapped air to escape
- which items need masking or protection during the process
- what must be tested before potting removes access
- which visual, electrical, or functional checks remain after cure
- whether the product is repairable, factory-reworkable, or replacement-only
These answers reduce late changes in fixtures, masking, material, test procedures, and production routing. They also make the RFQ more comparable because each supplier receives the same clear scope.
Mechanical and Enclosure Checks Before Potting
Start with the physical space that will receive the resin. The enclosure is part of the potting process, not just a mechanical shell around it.
Define the cavity and fill boundary
The handoff package should show the fill area, target fill height, and no-fill zones. Include cross-sections when the board sits inside a deep or complex cavity. A simple top-view drawing may not reveal barriers, low spots, internal walls, tall components, or locations where air can be trapped.
Confirm:
- internal cavity dimensions and usable resin volume
- board position and standoff height inside the enclosure
- target fill level and tolerance where relevant
- areas that must remain free of resin
- whether the resin should cover component tops, stop below them, or fill only selected regions
- drainage, venting, or air-escape considerations in the enclosure geometry
Review thermal and mechanical interfaces
Potting can change how the completed module behaves mechanically and thermally. Review heat-producing components, heat sinks, thermal pads, enclosure contact areas, mounting screws, cable exits, and regions where the board or housing can move during use.
The goal is not to assume the resin creates or removes a thermal problem. The goal is to identify where the material, fill height, and enclosure design need product-specific confirmation. If a heat path or mechanical interface is critical, include it in the drawing and validation plan rather than relying on a general resin family description.
Plan fixtures before release
The board may need to be held at a defined angle or height during dispensing and cure. A fixture can protect connectors, maintain fill level, support wires, prevent movement, and ensure the product is handled consistently. If the enclosure arrives as a separate part, clarify whether the supplier receives it, assembles it, or works from a customer-provided fixture.
PCB Layout, Connector, Keepout, and Masking Checks
Layout decisions determine whether potting can be applied without blocking the product's essential functions. A good review makes those dependencies explicit.
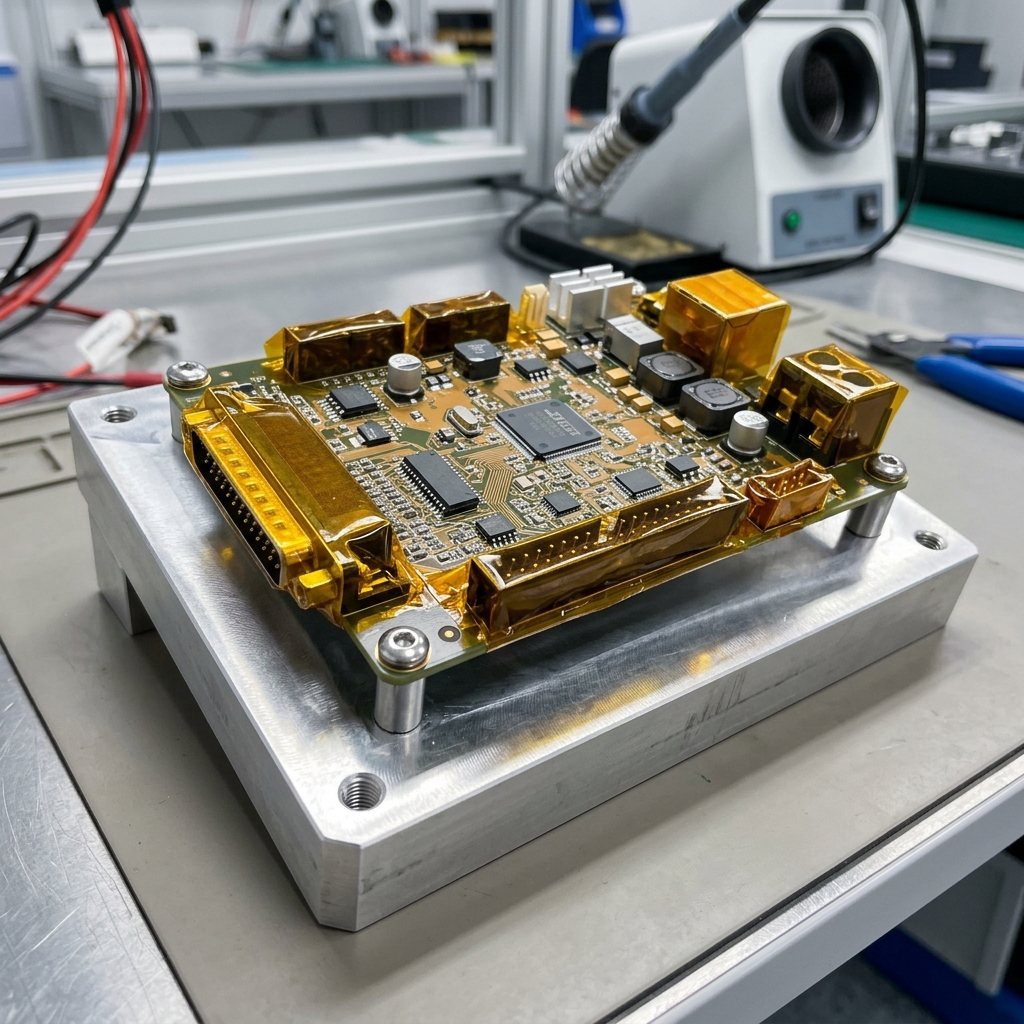
Proper application of polyimide masking tape over critical connector regions to prevent resin ingress during potting.
Mark resin keepouts clearly
Identify every feature that must stay accessible or free of resin:
- plug-in and mating connectors
- buttons, switches, displays, LEDs, lenses, and sensor windows
- test points, programming pads, debug headers, and calibration points
- mounting holes, grounding features, threaded inserts, and screw paths
- barcodes, serial labels, date codes, and regulatory labels
- venting features or areas that need later inspection
Mark these on a controlled drawing, not only in an email. For complex assemblies, include a photo or annotated sample showing how the masking should look before dispensing.
Check component placement against fill flow
Tall components, closely spaced parts, wire loops, shielding cans, and narrow wall gaps can create pockets where air remains trapped or resin flow becomes inconsistent. Review whether the dispense path can reach the required areas without splashing, shadowing, or leaving unfilled regions.
Questions worth asking include:
- Is there a clear path for resin to enter and for air to leave?
- Are critical components positioned below the intended fill level?
- Could a connector body or tall component create an inaccessible void underneath?
- Does the board need a designated fill port, vent, or process opening in the enclosure?
- Are cables and wire terminations supported so they cannot shift during cure?
Define masking responsibility and acceptance
Masking is a controlled manufacturing operation. Define which areas are masked, what material or method is acceptable, how masking is removed, and what a passing result looks like. If the product has a cosmetic boundary, fill line, or exposed interface, include sample photos in the approval package.
Test Strategy Before and After Potting
Potting often changes what can be tested. The test plan should be written before the first unit is filled.
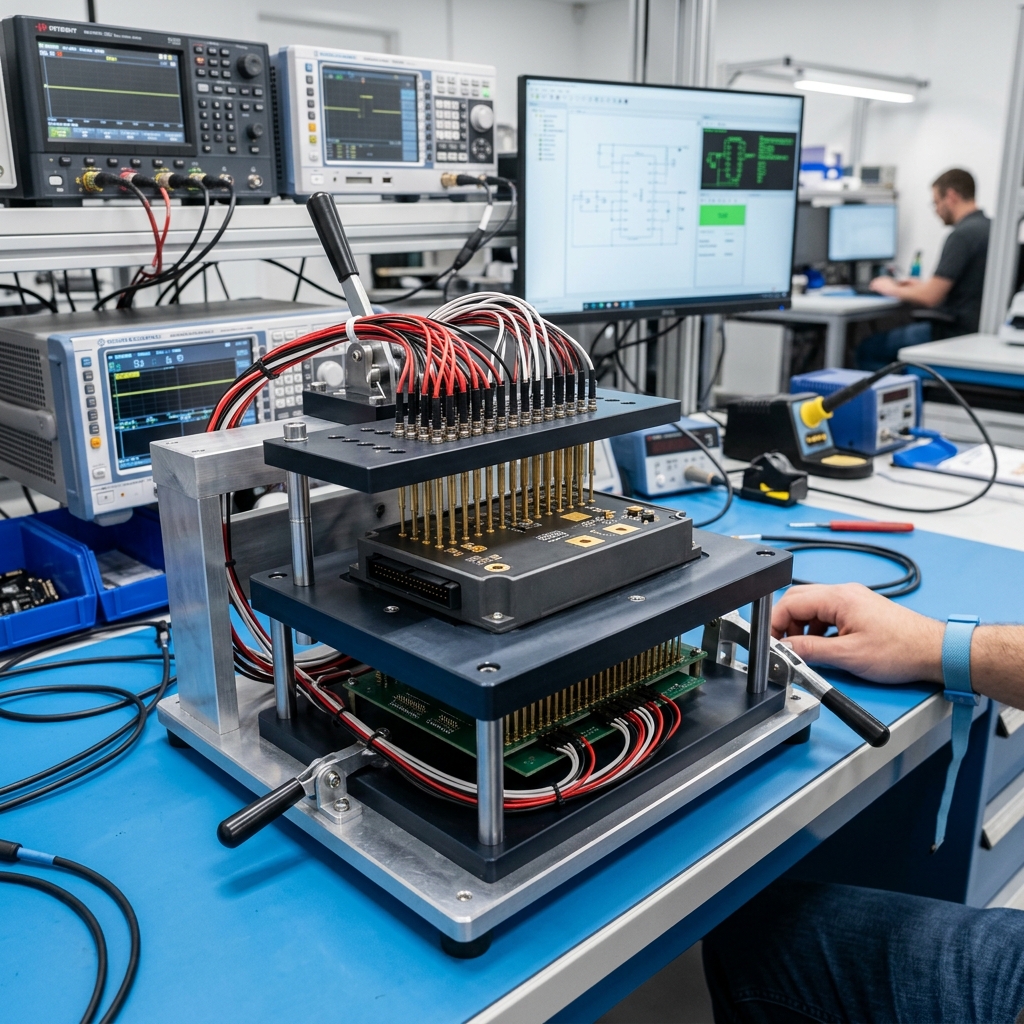
A bed-of-nails functional test fixture verifying electrical performance before the potting encapsulation step.
Complete critical tests before fill
Perform all tests that require direct access to pads, connectors, components, adjustments, or programming interfaces before potting. Depending on the product, that may include programming, in-circuit checks, continuity checks, high-potential tests, functional test, calibration, or visual inspection.
The exact sequence should be product-specific. The important point is to record which test proves a unit is acceptable before it becomes inaccessible.
Define post-potting checks
After cure, the assembly may still need visual verification, fill-height confirmation, label inspection, connector check, functional test through external interfaces, leakage or insulation checks, or an approved photographic record. Define those checks together with the quality testing service requirements.
Avoid a vague instruction such as “inspect for bubbles.” State what is being checked, where it is visible, what the acceptance level is, how it is documented, and what happens if a unit falls outside the agreed standard.
Plan failure handling
If a pre-potting test fails, the unit may still be repairable. If a post-potting test fails, the repair path may be very different. Agree in advance whether the supplier should stop, report, rework under an approved process, or replace the module. This protects both schedule and traceability.
Process Documentation Needed for a Cleaner Supplier Handoff
An effective potting package brings mechanical, electrical, and process information together. Before requesting a quote, prepare:
- PCB fabrication and assembly files, BOM, placement data, and revision-controlled assembly drawing
- enclosure drawings, cross-sections, cavity dimensions, and board-location details
- material part number or performance requirements and any approved equivalent policy
- fill map, fill height, no-fill zones, venting assumptions, and masking drawing
- photo, sample, or first-article approval requirement where appearance matters
- pre-potting and post-potting test plan
- environmental, thermal, vibration, electrical, or compliance requirements relevant to the finished module
- packaging, handling, cure, and shipping constraints
The BOM Readiness Checker can help identify missing material and assembly inputs before the formal RFQ. It does not replace a potting review, but it can help make the broader handoff package cleaner.
Keep the process package under revision control
Potting work can fail when the PCB revision, enclosure drawing, masking image, material note, and test procedure are not tied to the same product revision. A supplier may receive a correct board file but an older fill drawing, or the customer may approve a sample built against a different enclosure revision.
Use a controlled release package with a clear revision identifier for the assembly drawing, enclosure drawing, fill and keepout map, material requirement, test procedure, and first-article record. If the product changes after sample approval, identify whether the change affects cavity volume, air escape, masking, fill level, connectors, test access, or cure handling. That simple discipline is often more valuable than adding detail to an uncontrolled email thread.
Define first-article approval before volume production
For a new potted assembly, the first article should demonstrate the agreed production intent. It is useful to decide in advance which photos, measurements, inspection results, test records, and customer approvals are required before the process moves to a larger batch.
A first-article review can include the resin identity and lot traceability where required, visual coverage and fill line, masking removal, connector access, label visibility, functional test results, and any product-specific check for voids or cure condition. This avoids a late disagreement about whether the first result is representative enough to release.
Common Potting DFM Mistakes That Increase Cost or Rework Risk
Several common misses create avoidable clarification loops:
| DFM gap | Typical consequence |
|---|---|
| No fill height or resin boundary | Supplier cannot define volume, fixture, or inspection scope reliably |
| Connector and test-point keepouts missing | Functional access may be blocked after cure |
| No enclosure cross-section | Air-trap, clearance, and fill-flow issues appear after setup |
| Material named only by color or general type | Cure, process, and qualification assumptions remain unclear |
| Testing defined only after potting | Failed units may be difficult to diagnose or repair |
| No sample approval criteria | Visual boundary, bubbles, fill level, and masking quality become subjective |
Treat these as release-package issues, not shop-floor cleanup work. A short engineering review before quote is usually less costly than changing a fixture or rejecting cured assemblies after production begins.
Conclusion
PCBA potting DFM is about preserving intent through manufacturing. A complete package defines the cavity, fill boundary, access restrictions, masking, material, test sequence, acceptance criteria, and failure path before resin is dispensed.
Use this checklist before handing a design to a PCB assembly service partner. When the drawings and test requirements are ready, send them through the contact page so the potting process can be reviewed with the rest of the assembly plan.
FAQ About PCBA Potting DFM
Should test points be potted over?
Only after the required programming, verification, and test steps are complete, or when the design provides another approved way to test the product. Mark test-point access requirements clearly in the handoff package.
Does every potted assembly need a custom fixture?
Not every product needs a complex fixture, but the supplier still needs a repeatable way to hold the board, enclosure, cables, and fill level during dispensing and cure. The appropriate fixture depends on the geometry and process.
What should be approved on a first potted sample?
Review material identity, fill area, fill level, masking result, visible defects, cure condition, external interface access, and the agreed pre- and post-potting test results.